오늘은 네비게이션을 구현하는 2가지 방법/구조에 대해서 정리해 보았다.
- Navigator.push
- Navigator.pushNamed
Navigator.push & Navigator.pop 방식으로 구현하는 경우.
void main() {
  runApp(const MyApp());
}

class MyApp extends StatelessWidget {
  const MyApp({Key? key}) : super(key: key);

  // This widget is the root of your application.
  @override
  Widget build(BuildContext context) {
    return MaterialApp(
      title: 'Flutter Demo',
      theme: ThemeData(
        primarySwatch: Colors.blue,
      ),
      home: const FirstPage(), // push
    );
  }
}

class FirstPage extends StatelessWidget {
  const FirstPage({Key? key}) : super(key: key);

  @override
  Widget build(BuildContext context) {
    return Scaffold(
      appBar: AppBar(
        title: const Text('First Page'),
      ),
      body: Center(
          child: ElevatedButton(
              onPressed: () {
                print('Go to the Second page');
                Navigator.push(
                    context,
                    MaterialPageRoute(
                        builder: (context) => const SecondPage()));
              },
              child: const Text('Go to the Second page'))),
    );
  }
}

class SecondPage extends StatelessWidget {
  const SecondPage({Key? key}) : super(key: key);

  @override
  Widget build(BuildContext context) {
    return Scaffold(
      appBar: AppBar(
        title: const Text('Second Page'),
      ),
      body: Center(
          child: ElevatedButton(
              onPressed: () {
                print('Go to the First page');
                Navigator.pop(context);
              },
              child: const Text('Go to the First page'))),
    );
  }
}

Navigator.pushNamed& Navigator.pop 방식으로 구현하는 경우.
void main() {
  runApp(const MyApp());
}

class MyApp extends StatelessWidget {
  const MyApp({Key? key}) : super(key: key);

  // This widget is the root of your application.
  @override
  Widget build(BuildContext context) {
    return MaterialApp(
      title: 'Flutter Demo',
      theme: ThemeData(
        primarySwatch: Colors.blue,
      ),
      initialRoute: '/', // push_named
      routes: {          // push_named
        '/' : (context) => const ScreenA(),
        '/b' : (context) => const ScreenB(),
        '/c' : (context) => const ScreenC(),
      },
    );
  }
}

class ScreenA extends StatelessWidget {
  const ScreenA({Key? key}) : super(key: key);

  @override
  Widget build(BuildContext context) {
    return Scaffold(
      appBar: AppBar(
        title: const Text('Screen A'),
      ),
      body: Center(
        child: Column(
          mainAxisAlignment: MainAxisAlignment.center,
          mainAxisSize: MainAxisSize.min,
          children: [
            ElevatedButton(
              onPressed: () {
                print('Go to the Screen B');
                Navigator.pushNamed(context, '/b');
              },
              child: const Text('Go to the Screen B'),
            ),
            ElevatedButton(
              onPressed: () {
                print('Go to the Screen C');
                Navigator.pushNamed(context, '/c');
              },
              child: const Text('Go to the Screen C'),
            ),
          ],
        ),
      ),
    );
  }
}

class ScreenB extends StatelessWidget {
  const ScreenB({Key? key}) : super(key: key);

  @override
  Widget build(BuildContext context) {
    return Scaffold(
      appBar: AppBar(
        title: const Text('Screen B'),
      ),
      body: Center(
          child: Column(
            mainAxisSize: MainAxisSize.min,
            children: [
              ElevatedButton(
                onPressed: () {
                  print('Screen B --> Screen A');
                  Navigator.pop(context);
                  // Navigator.pushNamed(context, '/');
                },
                child: const Text('Go to the Screen A'),
              ),
            ],
          )),
    );
  }
}

class ScreenC extends StatelessWidget {
  const ScreenC({Key? key}) : super(key: key);

  @override
  Widget build(BuildContext context) {
    return Scaffold(
      appBar: AppBar(
        title: const Text('Screen C'),
      ),
      body: Center(
          child: Column(
            mainAxisSize: MainAxisSize.min,
            children: [
              ElevatedButton(
                onPressed: () {
                  print('Screen C --> Screen A');
                  Navigator.pop(context);
                  // Navigator.pushNamed(context, '/');
                },
                child: const Text('Go to the Screen A'),
              ),
            ],
          )),
    );
  }
}
여기서 중요한 부분이 하나 더 있다. 네비게이션을 통해서 화면이 push 할때 stack 자료구조에 저장이 됩니다. 그리고 pop 할때 이전 화면으로 돌아가면서 이전 화면정보를 stack 에서 꺼내면서(pop 하면서) 삭제한다.
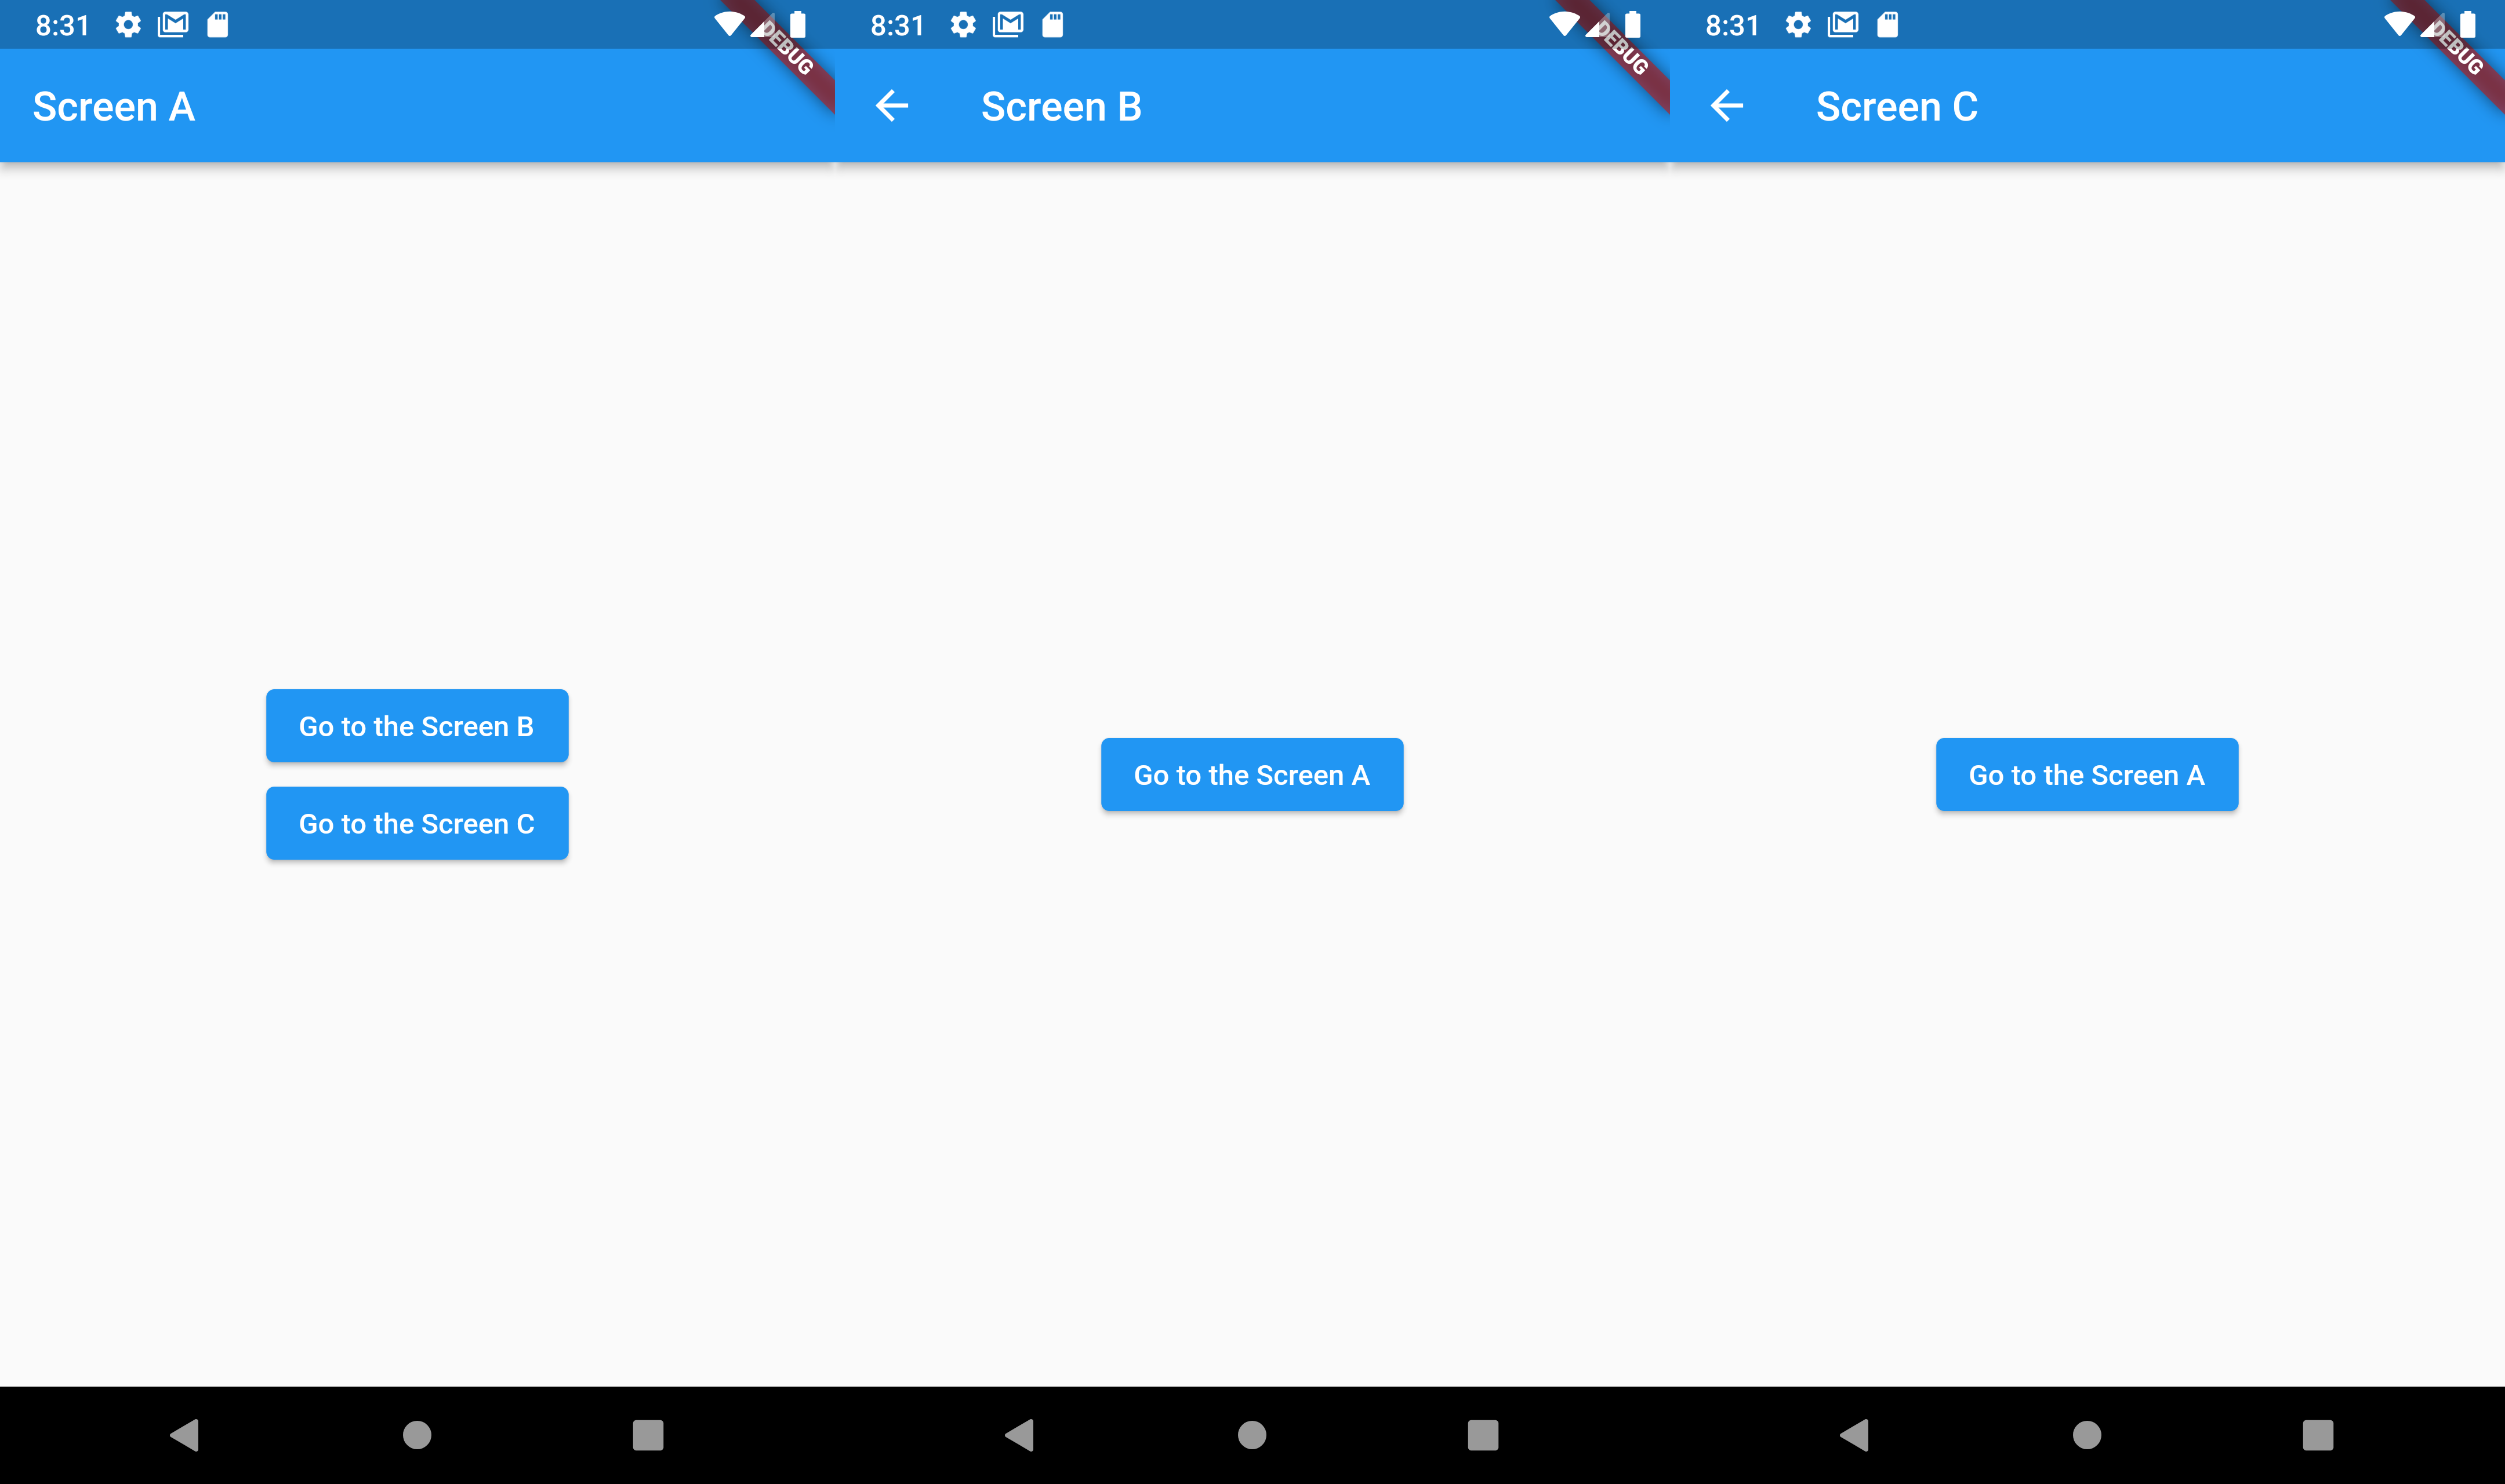
ScreenA 에서 ScreenB 로 이동하면 ScreenA 화면이 없어지는것이 아니고 ScreenB 가 ScreenA 위에 올려져있는 구조임.
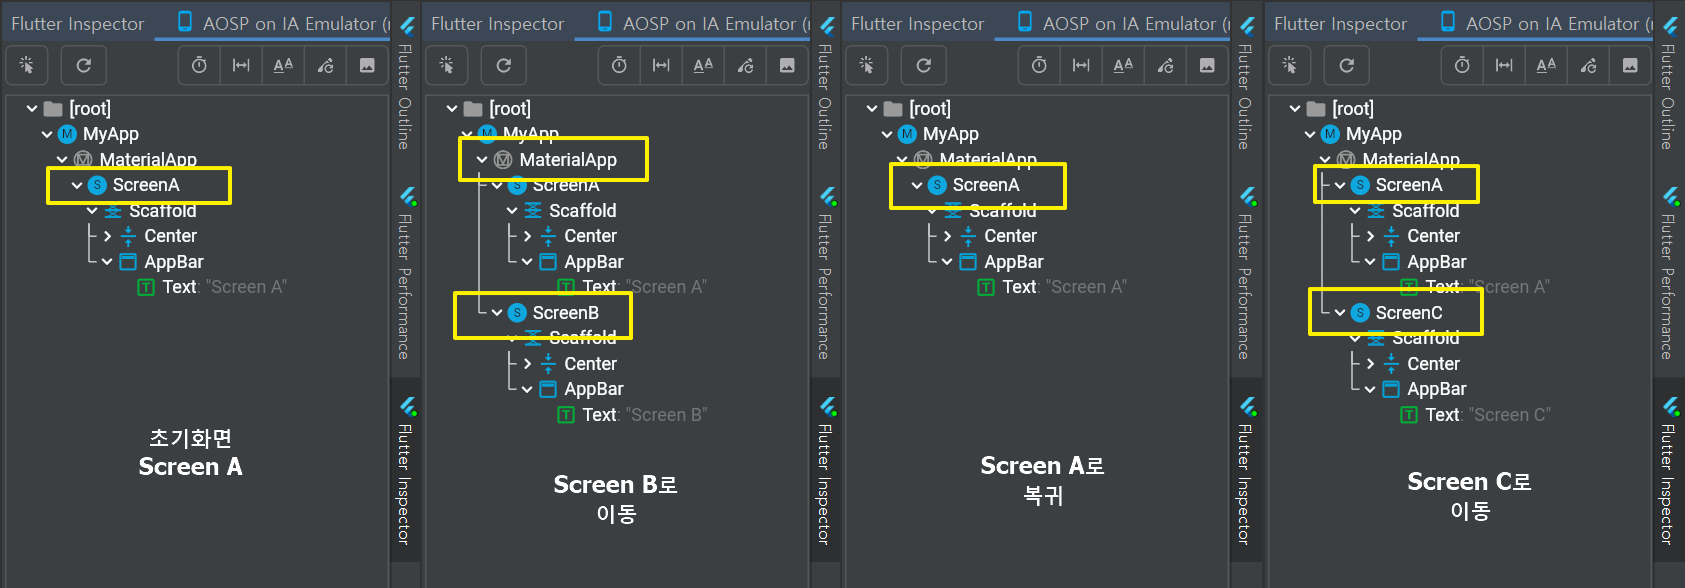
아래의 그림은 push()/pop 할때의 위젯트리의 정보입니다. stack 대신해서 위젯트리로 확인한 경우입니다.
ScreenA >> ScreenB >> ScreenA >> ScreenC
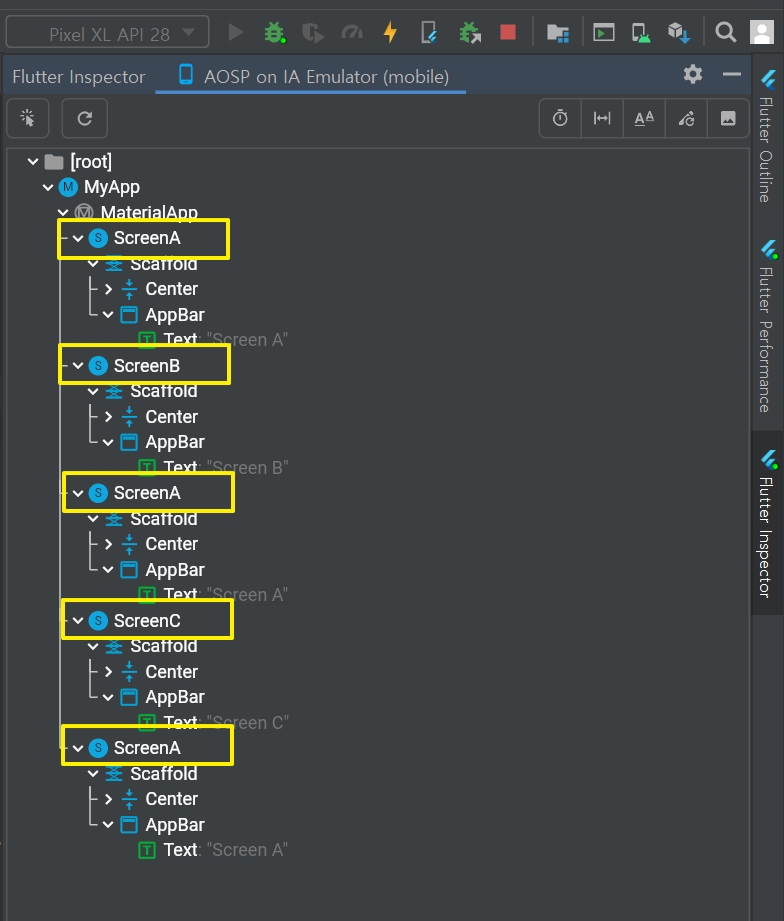
아래의 그림은 pop 을 하지 않고 push 만 계속할 경우입니다.
Navigator.pop(context) 를 사용하지 않고 Navigator.pushNamed(context, '/') 으로 코딩을 구현해도 화면상으로는 동일하게 보이지만 위젯트리구조를 보면 화면이 계속 쌓이는것을 볼수 있다.
아래 그림은 화면 위젯이 계속 쌓이는 화면 캡쳐이다.
[참고자료] 코딩셰프
[https://www.youtube.com/watch?v=BWG9XS5ecig&list=PLQt_pzi-LLfpcRFhWMywTePfZ2aPapvyl&index=23]
'Flutter > 06 Basic' 카테고리의 다른 글
| [Flutter] 안드로이드 스튜디오 설정 - 자동완성 기능 추가 (0) | 2022.08.18 |
|---|---|
| [Flutter] Firestore 구조 알아보기 (0) | 2022.08.12 |
| [Flutter] Basic - key (0) | 2022.07.08 |
| [Flutter] Basic - ScaffoldMessenger (0) | 2022.04.14 |
| [Flutter] Basic - BuildContext context (0) | 2022.04.10 |


